Androidでジオフェンスを実装してみました。
ジオフェンスとは
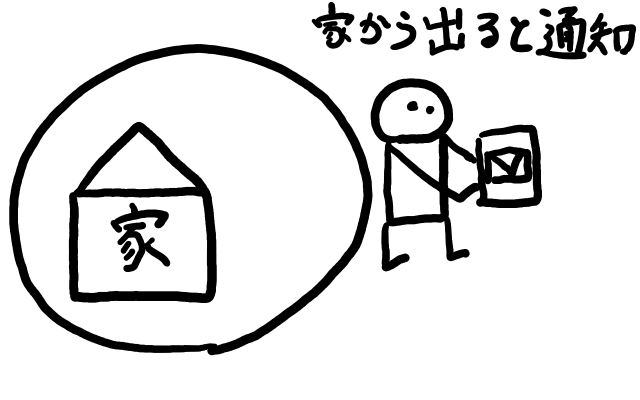
ジオフェンスとは仮想の地理的境界線です。
仮想の地理的な境界線をつくり、その境界線から出たかどうかを判定できます。
例えば、ある人が家から出たことを検知し、ガスの締め忘れや鍵の閉め忘れがあった場合は通知を出すという用途で使えます。
(参考) ジオフェンスとは | ESRIジャパン
https://www.esrij.com/gis-guide/gis-other/geo-fense/
何を実装したのか
家から出ると通知を受け取るAndroidアプリを作ってみました。
実装
直近の位置情報を取得する
まず家の位置を覚える必要があります。
そのため、下記を参考に直近の位置情報を取得する処理を実装しました。
(参考) 直近の位置情報を取得する
https://developer.android.com/training/location/retrieve-current?hl=ja
package com.example.geofencetest.ui.main

import android.Manifest
import android.content.pm.PackageManager
import android.location.Location
import androidx.lifecycle.ViewModelProvider
import android.os.Bundle
import android.util.Log
import androidx.fragment.app.Fragment
import android.view.LayoutInflater
import android.view.View
import android.view.ViewGroup
import androidx.core.app.ActivityCompat
import com.example.geofencetest.R
import com.google.android.gms.location.FusedLocationProviderClient
import com.google.android.gms.location.LocationServices

class MainFragment : Fragment() {

    companion object {
        fun newInstance() = MainFragment()
        const val PERMISSION_REQUEST_CODE = 1001
        val TAG = MainFragment::class.java.simpleName
    }

    private lateinit var viewModel: MainViewModel
    private lateinit var fusedLocationClient: FusedLocationProviderClient

    override fun onCreateView(
        inflater: LayoutInflater, container: ViewGroup?,
        savedInstanceState: Bundle?
    ): View {
        return inflater.inflate(R.layout.main_fragment, container, false)
    }

    override fun onActivityCreated(savedInstanceState: Bundle?) {
        super.onActivityCreated(savedInstanceState)

        // viewModelの生成
        viewModel = ViewModelProvider(
            this,
            MainViewModel.MainViewModelFactory(this)
        ).get(MainViewModel::class.java)
        var isGranted = checkPermission()

        if (isGranted) {
            getLastLocation()
        }
    }

    /**
     * 権限許可依頼のコールバック
     */
    override fun onRequestPermissionsResult(
        requestCode: Int, permissions: Array<out String>,
        grantResults: IntArray
    ) {
        when (requestCode) {
            PERMISSION_REQUEST_CODE -> {
                if (grantResults.isEmpty()) {
                    throw RuntimeException("Empty permission result")
                }
                if (grantResults[0] == PackageManager.PERMISSION_GRANTED) {
                    // 現在地ボタンを有効にする
                    Log.d(TAG, "許可を得られた")
                    getLastLocation()
                } else {
                    Log.d(TAG, "許可を得られなかった")
                }
            }
        }
    }

    /**
     * パーミッションを確認する
     *
     * @return 処理結果(true : 権限が許可されている | false : 権限が許可されていない)
     */
    private fun checkPermission(): Boolean {
        if (ActivityCompat.checkSelfPermission(
                activity?.applicationContext!!,
                Manifest.permission.ACCESS_FINE_LOCATION
            ) != PackageManager.PERMISSION_GRANTED
            && ActivityCompat.checkSelfPermission(
                activity?.applicationContext!!,
                Manifest.permission.ACCESS_COARSE_LOCATION
            ) != PackageManager.PERMISSION_GRANTED
        ) {
            // 権限が許可されていない場合はリクエストする
            requestPermissions(
                arrayOf(
                    Manifest.permission.ACCESS_FINE_LOCATION,
                    Manifest.permission.ACCESS_COARSE_LOCATION
                ),
                PERMISSION_REQUEST_CODE
            )
            return false
        }
        return true
    }

    /**
     * 直近の緯度・経度を取得する
     */
    private fun getLastLocation() {
        fusedLocationClient = LocationServices.getFusedLocationProviderClient(activity)
        if (ActivityCompat.checkSelfPermission(
                activity?.applicationContext!!,
                Manifest.permission.ACCESS_FINE_LOCATION
            ) != PackageManager.PERMISSION_GRANTED && ActivityCompat.checkSelfPermission(
                activity?.applicationContext!!,
                Manifest.permission.ACCESS_COARSE_LOCATION
            ) != PackageManager.PERMISSION_GRANTED
        ) {
            // TODO: Consider calling
            //    ActivityCompat#requestPermissions
            // here to request the missing permissions, and then overriding
            //   public void onRequestPermissionsResult(int requestCode, String[] permissions,
            //                                          int[] grantResults)
            // to handle the case where the user grants the permission. See the documentation
            // for ActivityCompat#requestPermissions for more details.
            return
        }
        fusedLocationClient.lastLocation
            .addOnSuccessListener { location: Location? ->
                Log.d(
                    TAG,
                    "latitude : " + location?.latitude + " " + "longitude : " + location?.longitude
                )
            }
    }


}
ジオフェンスを作成する
下記を参考にジオフェンスを実装しました。
(参考) ジオフェンスの作成と監視
https://developer.android.com/training/location/geofencing?hl=ja
上記はGoogleの公式サイトですが、一部内容が欠けている箇所があったので合わせて下記のリポジトリを参考にしました。
(参考) dmutti/android-play-location
https://github.com/dmutti/android-play-location
完成したソースコードはこちらです。
https://github.com/hiroki777/GeofenceTest
エミュレータで通知を確認する
ジオフェンスが想定通り動作するのかエミュレータを使って確認しました。
エミュレータで現在地を自由に設定するためには、Telnetでエミュレータに接続し、現在地を設定するコマンドを送信します。
Telnetクライアントを有効にする
Windowsの場合Telnetクライアントを有効にします。(Macは未確認です)
(参考) [Windows] Windows10でTelnetを使用する
https://pasomaki.com/windows10-telnet-install/
コマンドを送信する
Telnetに接続します
telnet localhost console-port
auth 「.emulator_console_auth_token」ファイルの値
geo fix longitude latitude
※ ポート番号はウィンドウタイトルで確認できます。ウィンドウタイトルには「Nexus_5X_API_23:5554」のように記載されており、この場合5554がポート番号です。
(参考) エミュレータのコンソール コマンドを送信する
https://developer.android.com/studio/run/emulator-console
動作確認する
まず適当な地点でジオフェンスを作成し、次にジオフェンスの範囲を外れた地点に現在地が移動するようにgeoコマンドを送信し、通知を受信できれば成功です。
なお、理由はわからないのですが、コマンドを送信した後にGoogle Mapアプリを立ち上げないとレシーバーが起動しませんでした。

コメントを残す